Remove all bags and accessories from your bike that might block frame triangle from view.
Select one:
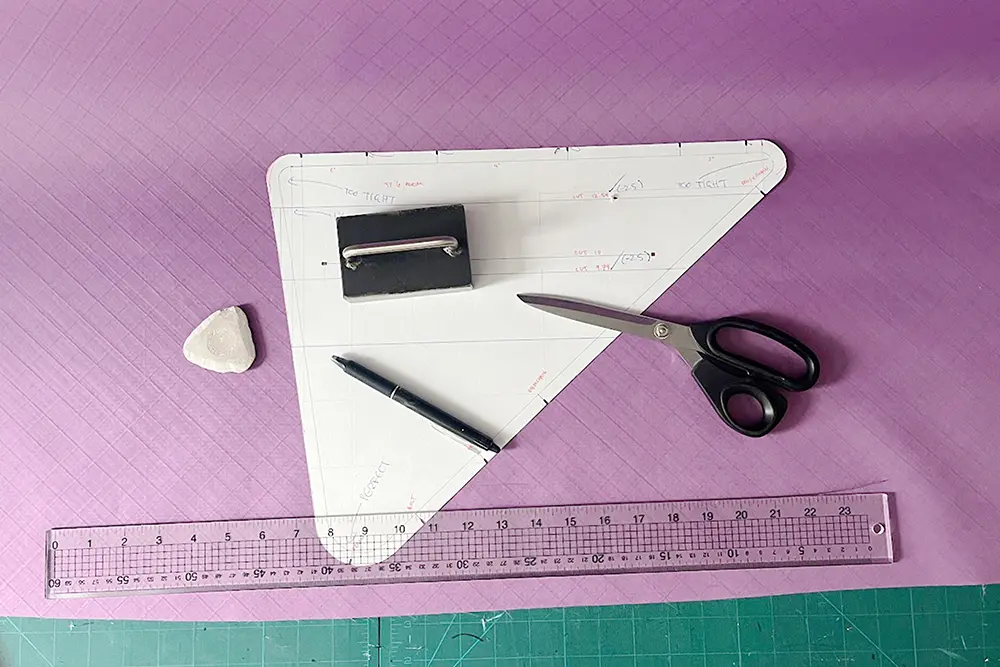
Printer paper method:
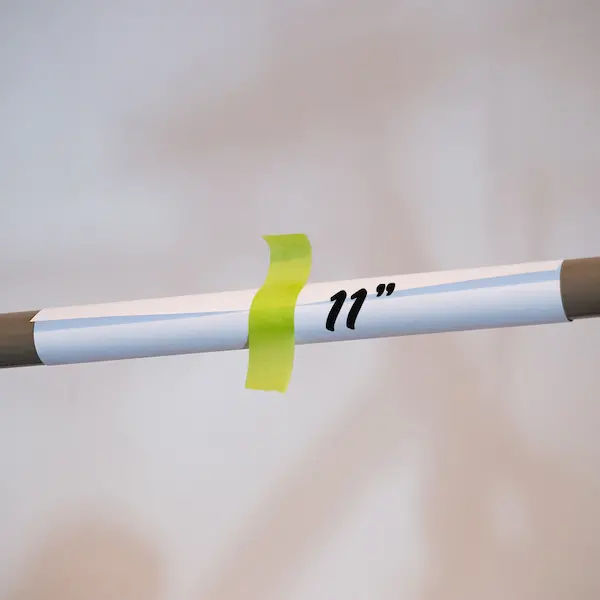
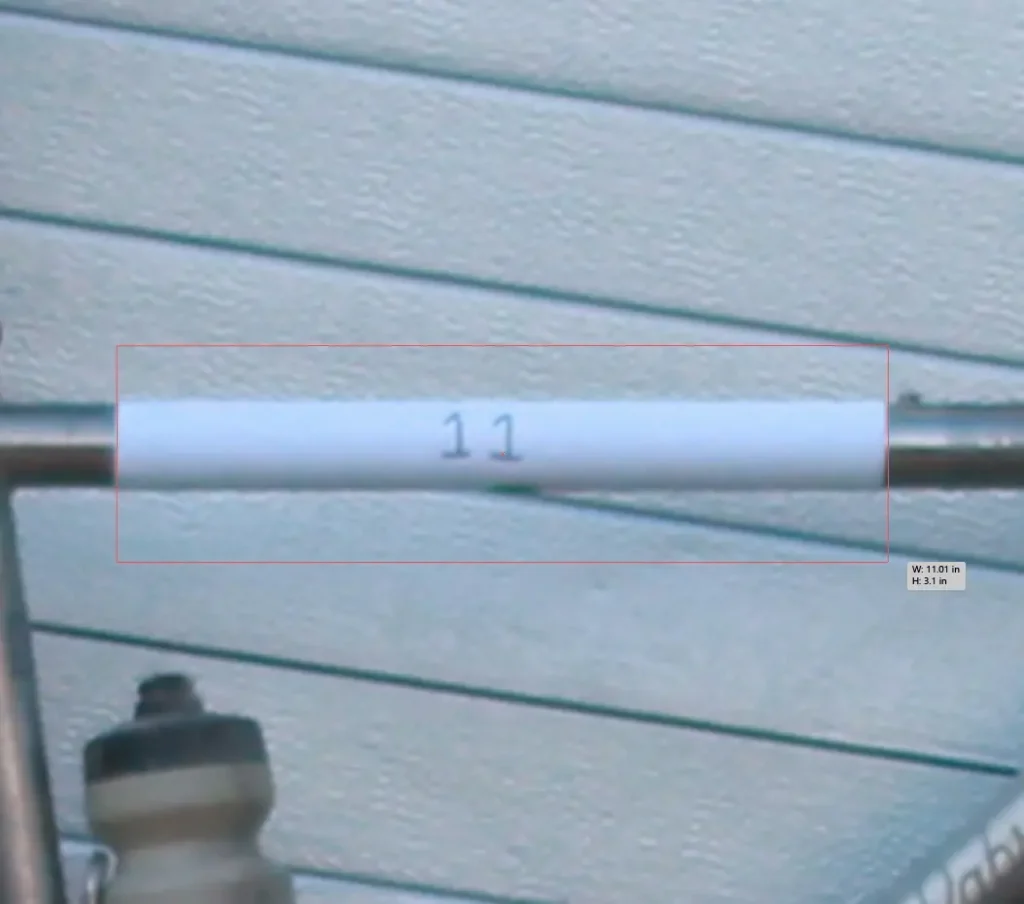
Take a standard sheet of printer paper and measure its length (e.g., 11″)
For light-colored frames, darken the ends of the paper with a marker to improve visibility
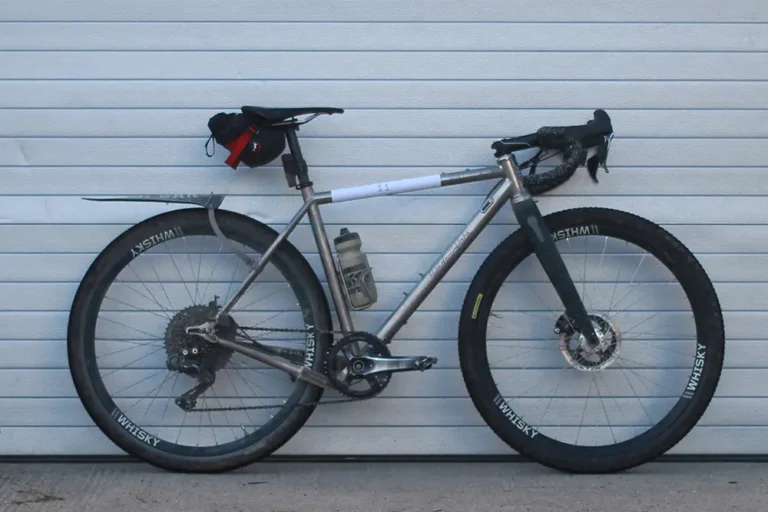
Roll the paper tightly around the top tube along the long edge (or seat tube/down tube) and secure it with tape, placing it under the cables if possible
Write the measurement clearly on the paper with a marker
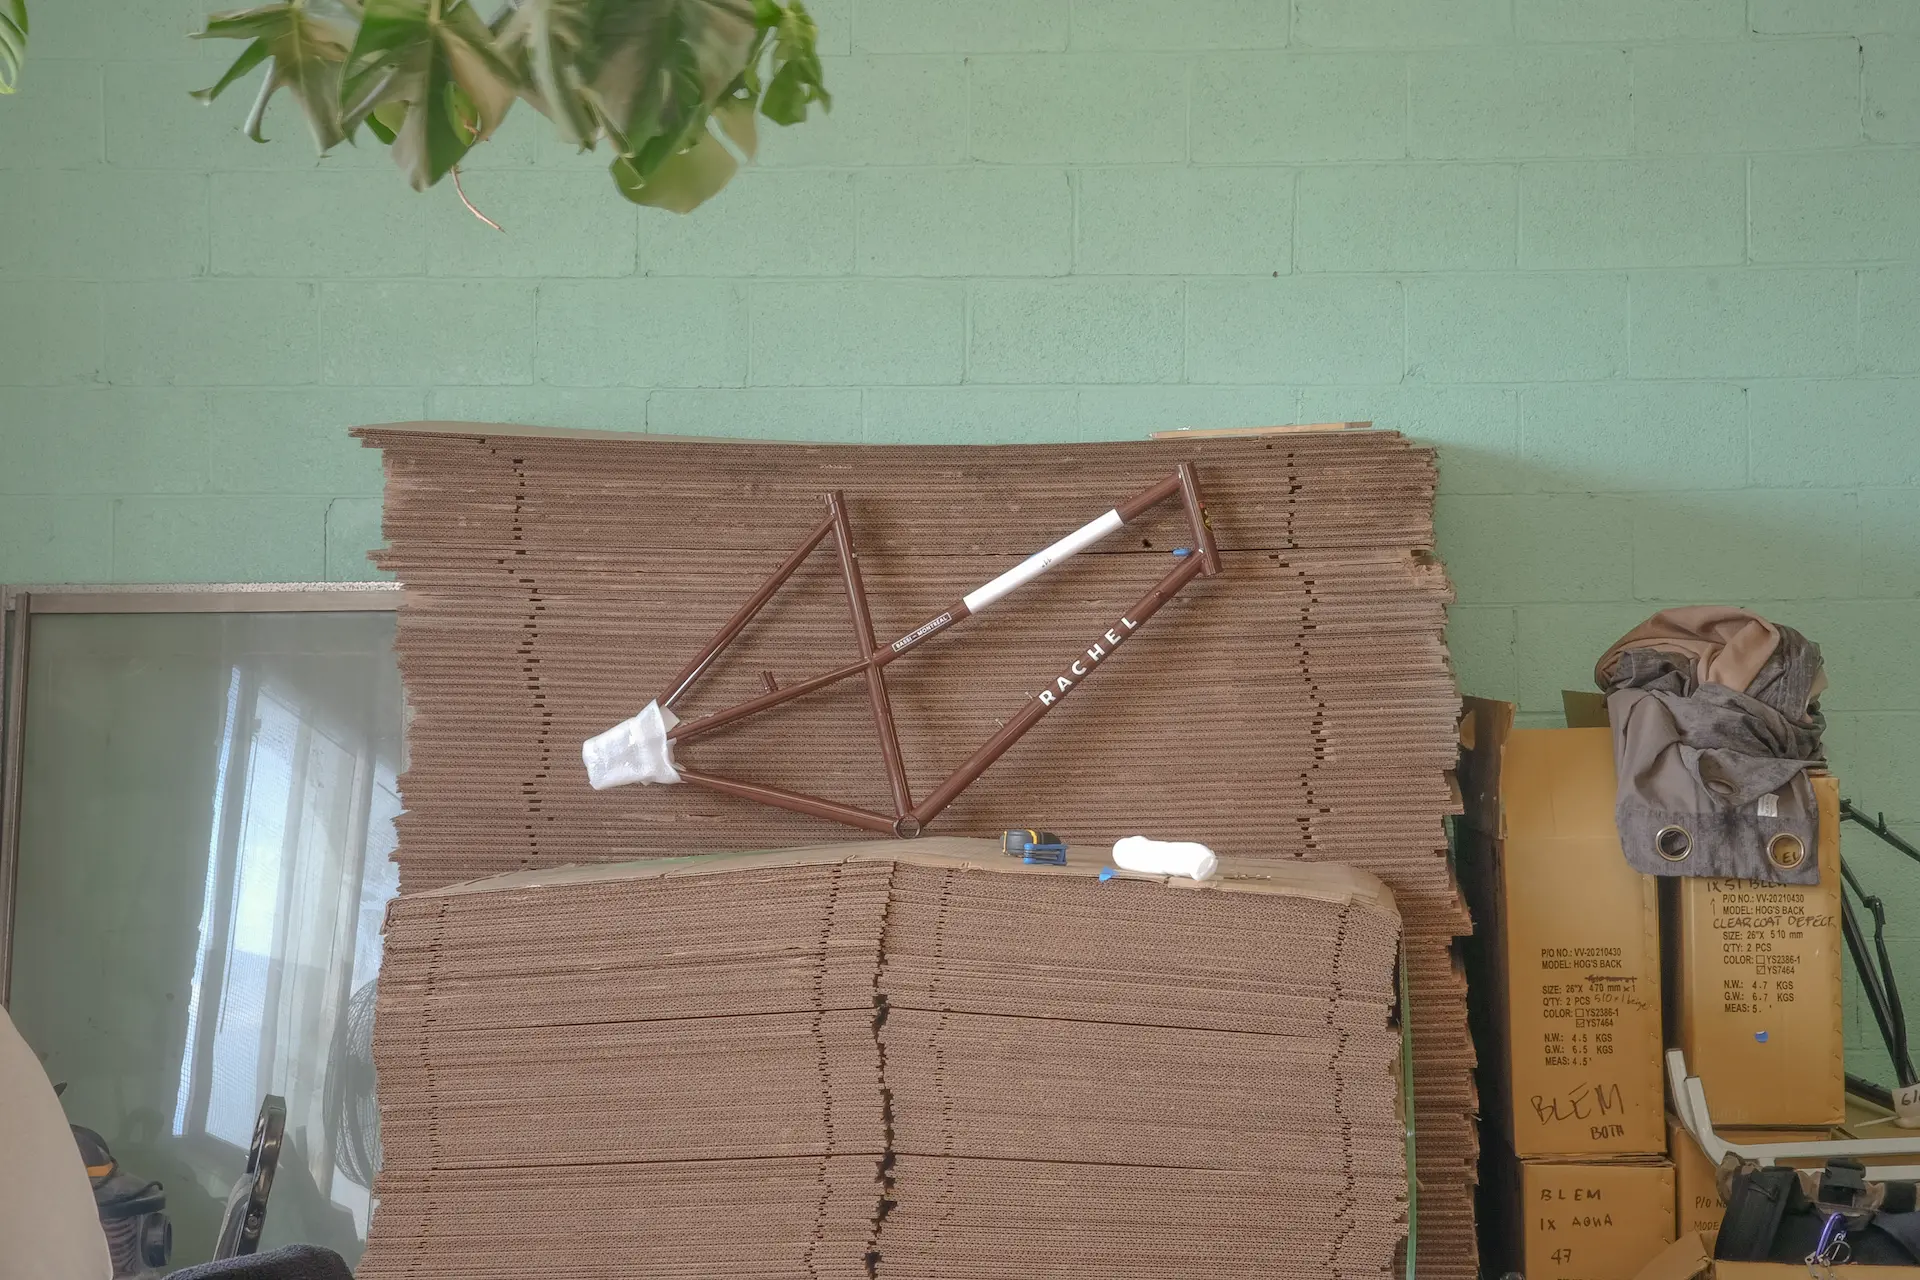
Cardboard method:
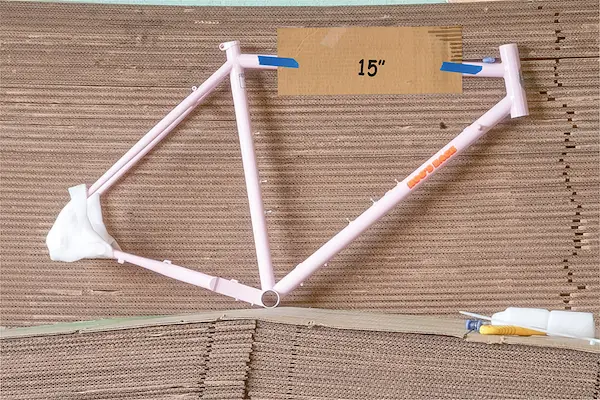
Measure and cut a piece of cardboard 11-20″ long (the longer, the better).
Note the exact length in millimeters.
Tape the cardboard flush to the frame, avoiding any key details.
Clearly write the measurement on the cardboard with a marker.
Pro Tips:
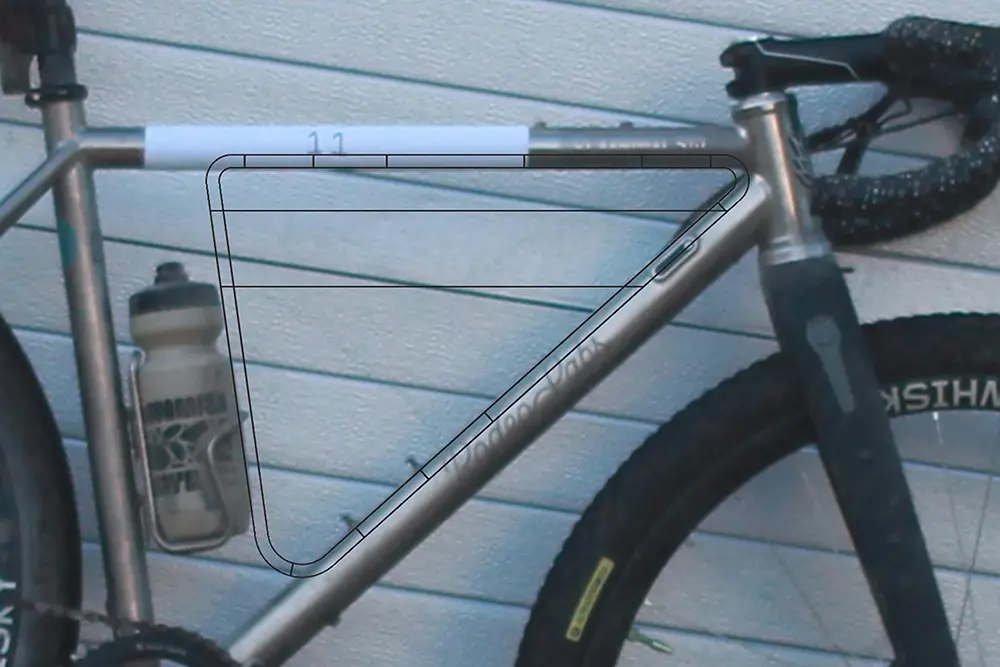
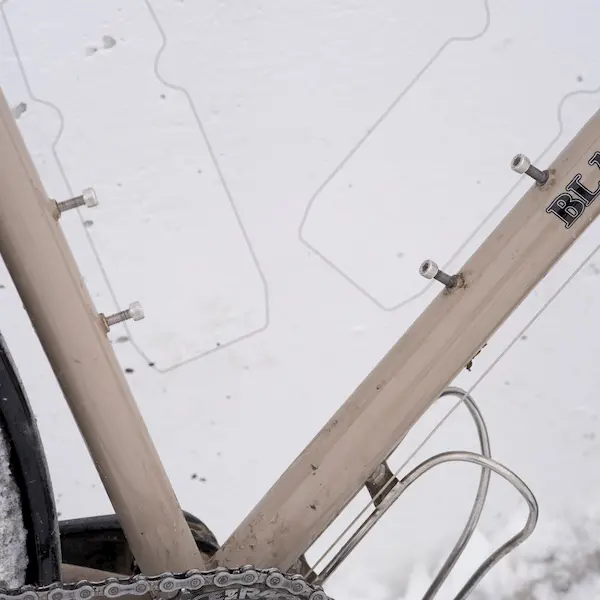
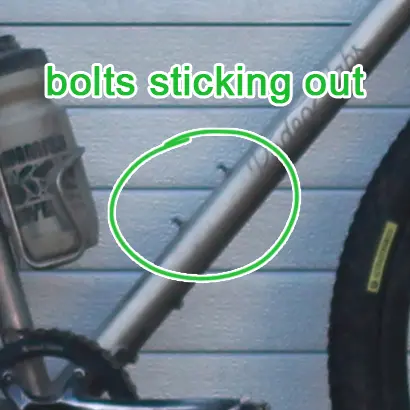
Don’t cover frame corners, bolts, or cable stops
Make sure ruler or tape markings are clearly visible
Bonus tip: Include a bill for scale reference and/or tape a ruler to the frame for reference points
Printer paper method. (DSLR / mirrorless prefered method)
Cardboard method. (Phone camera preferred method)
Ends must be tight and flush!
Step 3:
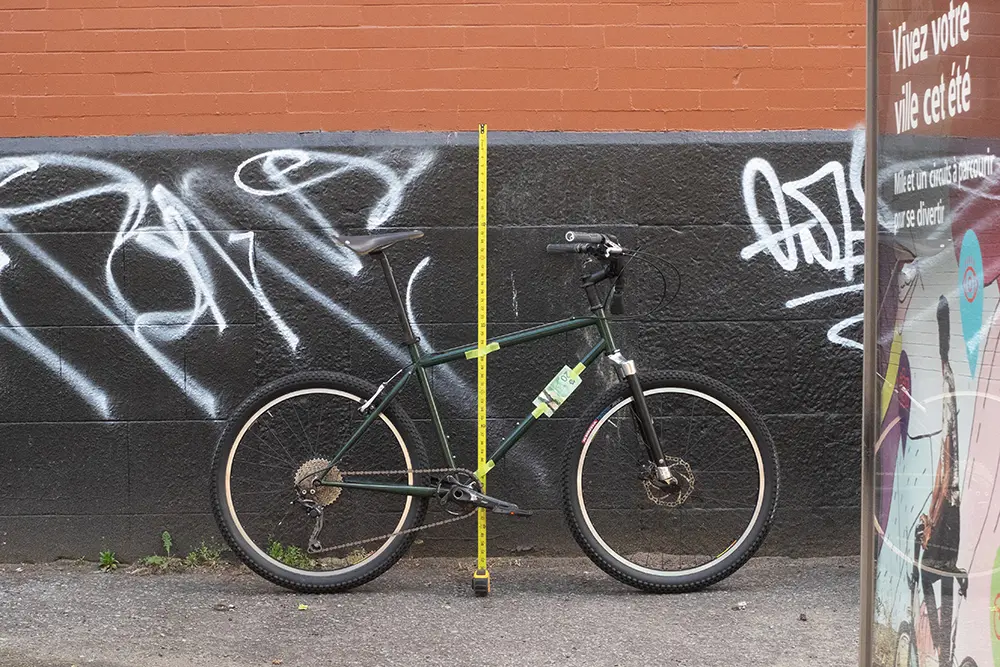
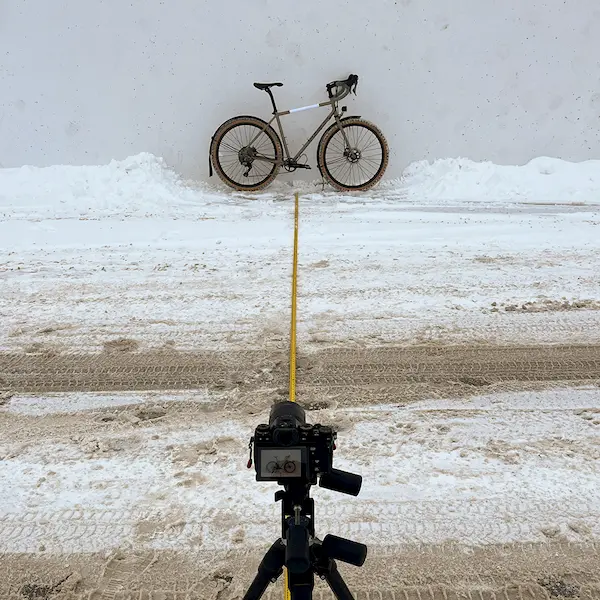
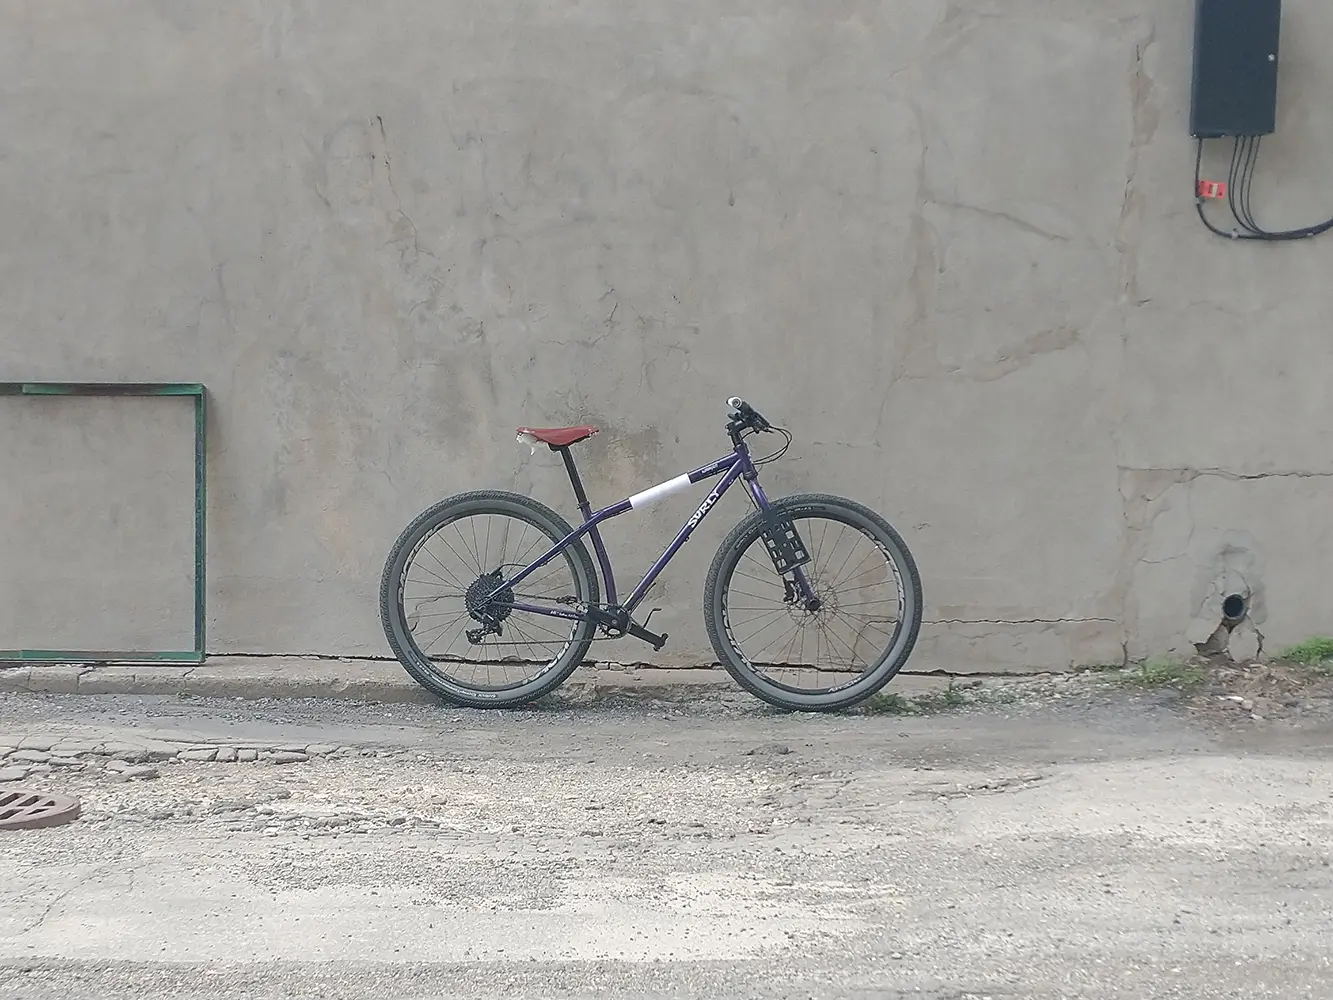
The photo: Set up in a long hallway or against a brightly lit wall outdoors.
Bike setup:
Handlebars on the right (driveside)
Lean the bike upright against a wall
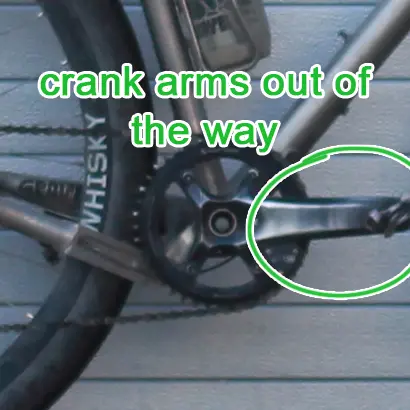
Rotate crank arms to 3 & 9 o’clock
Camera setup:
Use a DSLR, mirrorless, or high-megapixel smartphone (16MP+)
Set image format to RAW or high-quality JPEG
Use aperture f/8-16 and a tripod or shutter speed of 1/125
Zoom lens recommended; for phones, use the zoom feature
Ensure the photo is in landscape orientation
Select one:
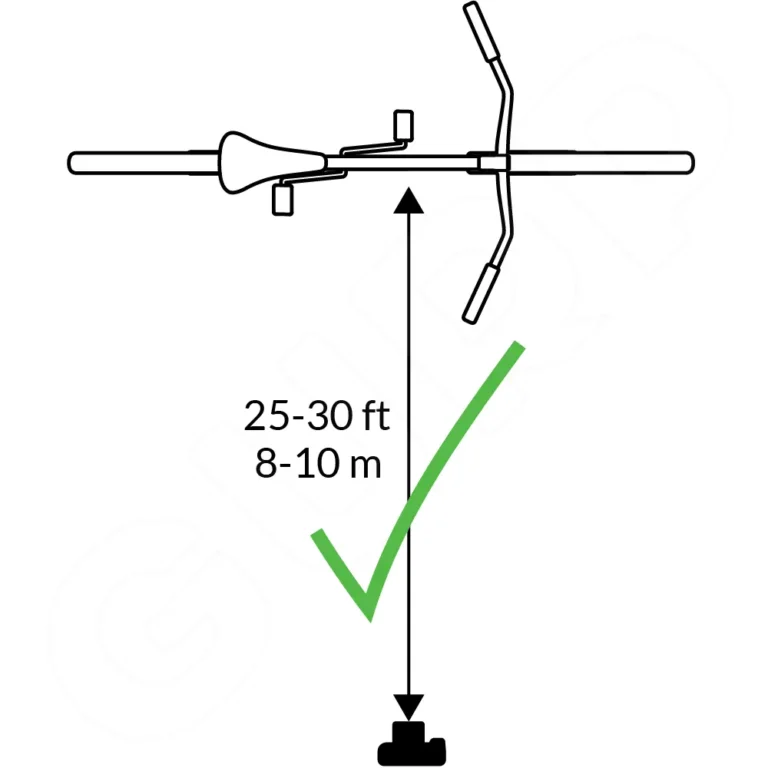
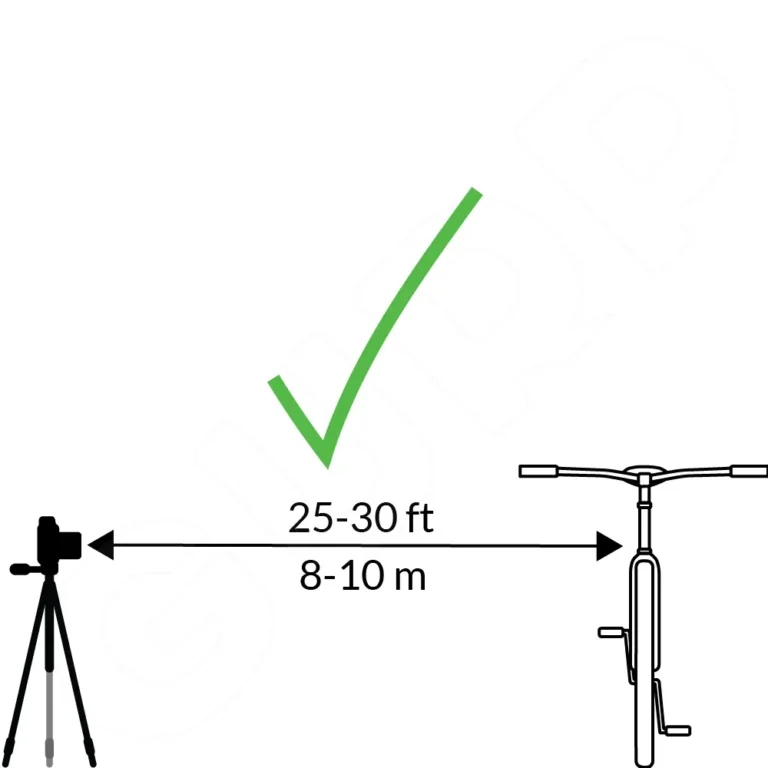
Step back 25-30 feet
Use a zoom lens if available
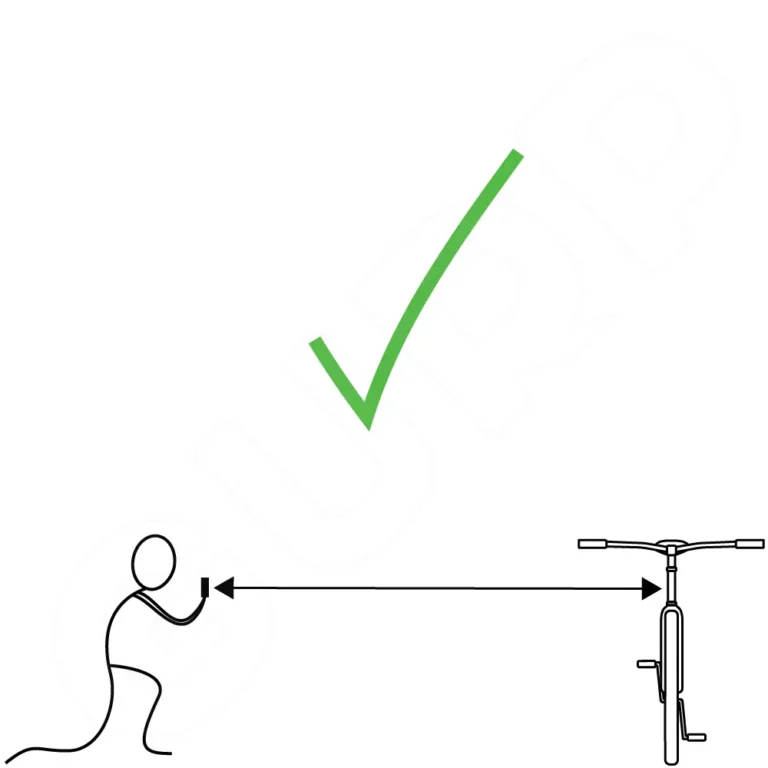
Align yourself perpendicular to the center of the frame
Crouch to take the photo at frame level
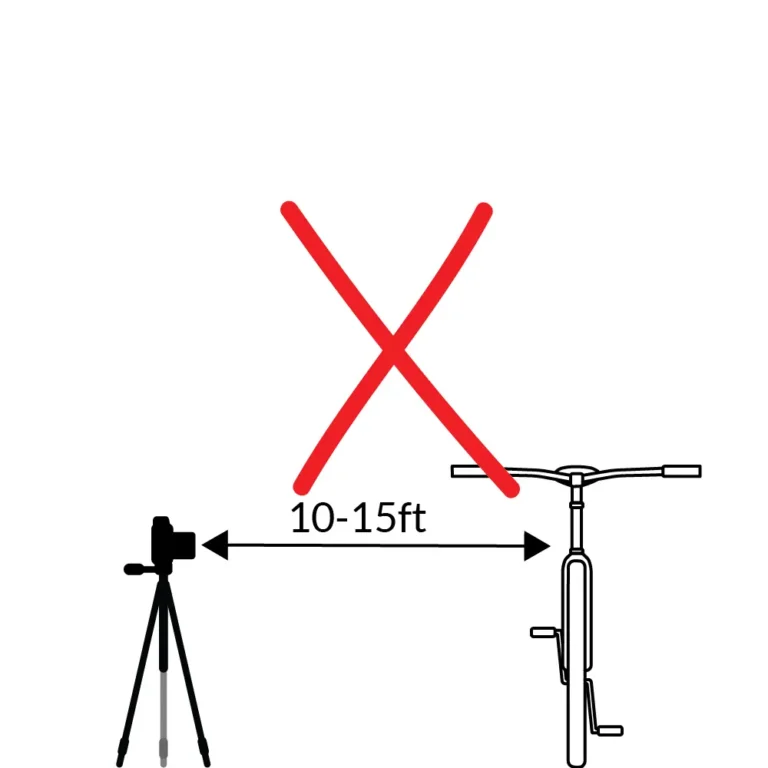
Step back 15 feet
Use a zoom lens if available
Align yourself perpendicular to the center of the frame
Crouch to take the photo at frame level
Camera is set up 25' away and level height with center of the frame. 15' will do with phone camera, but less accurate.
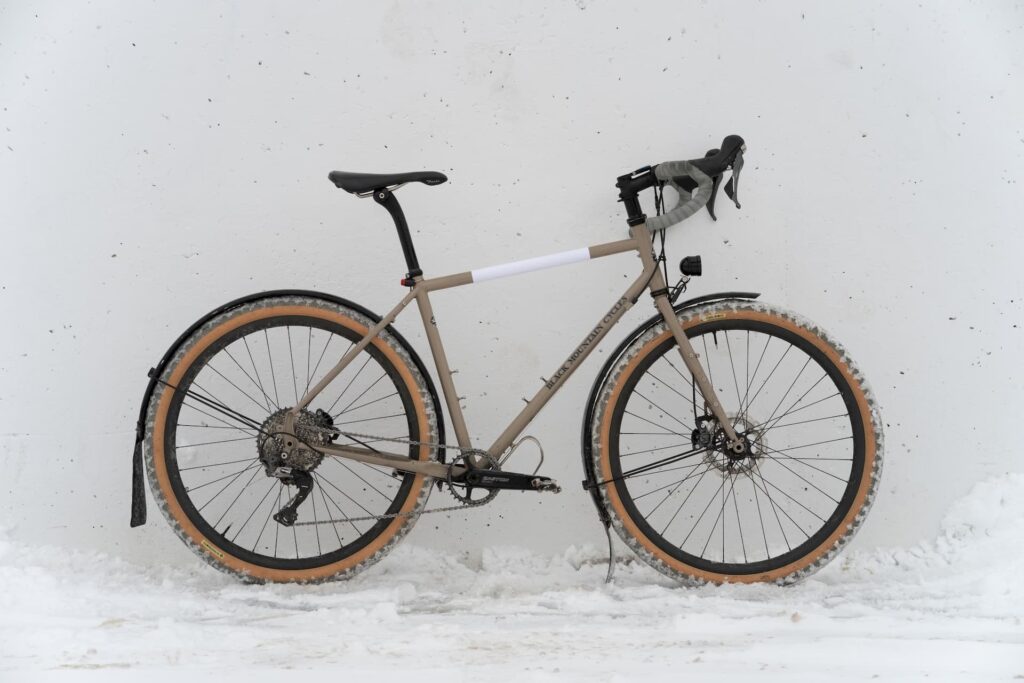
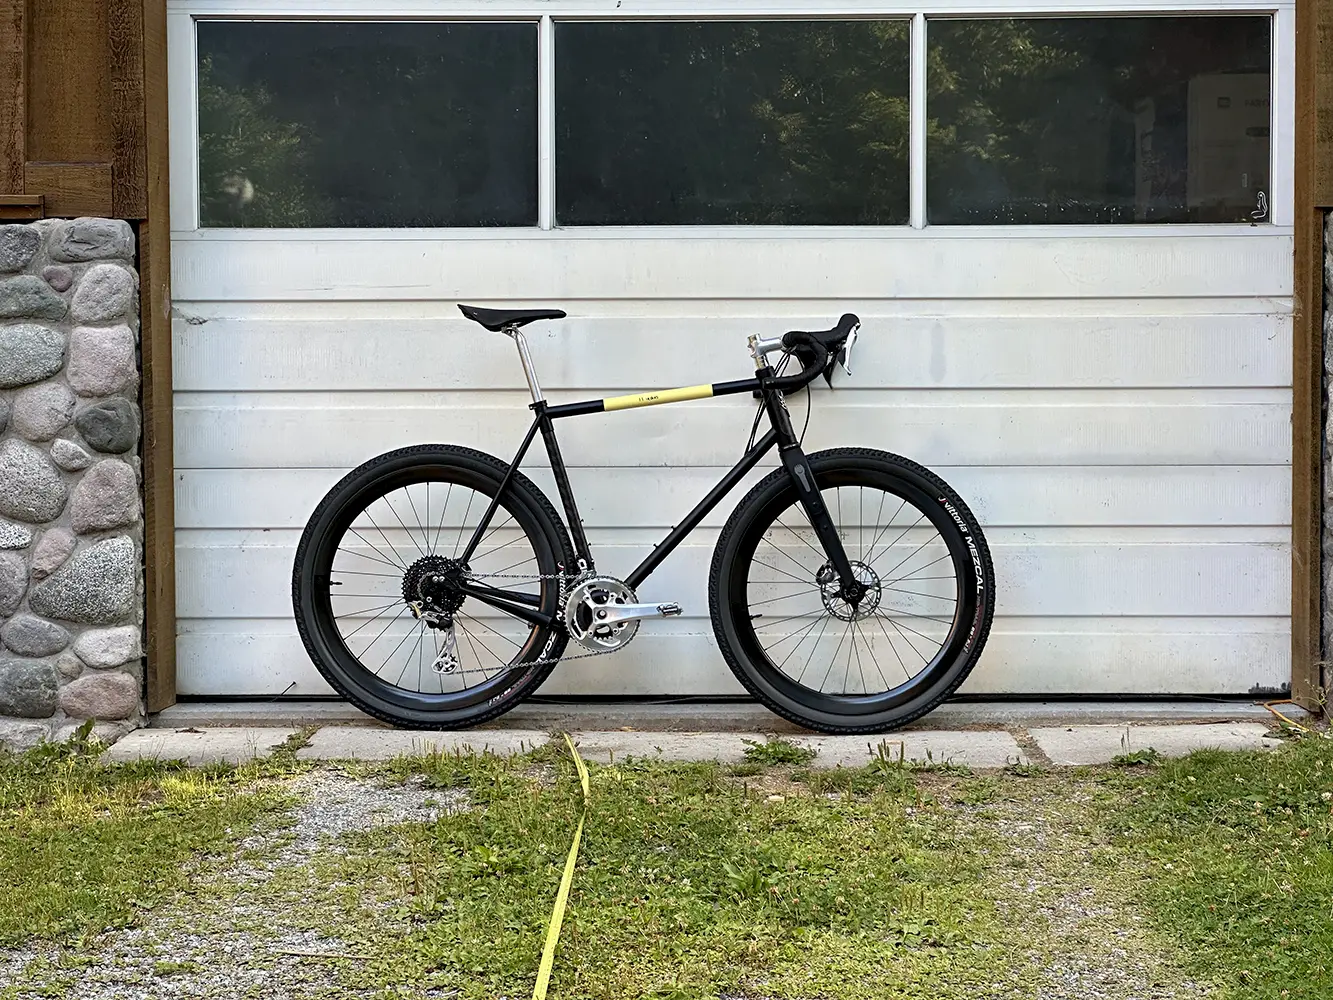
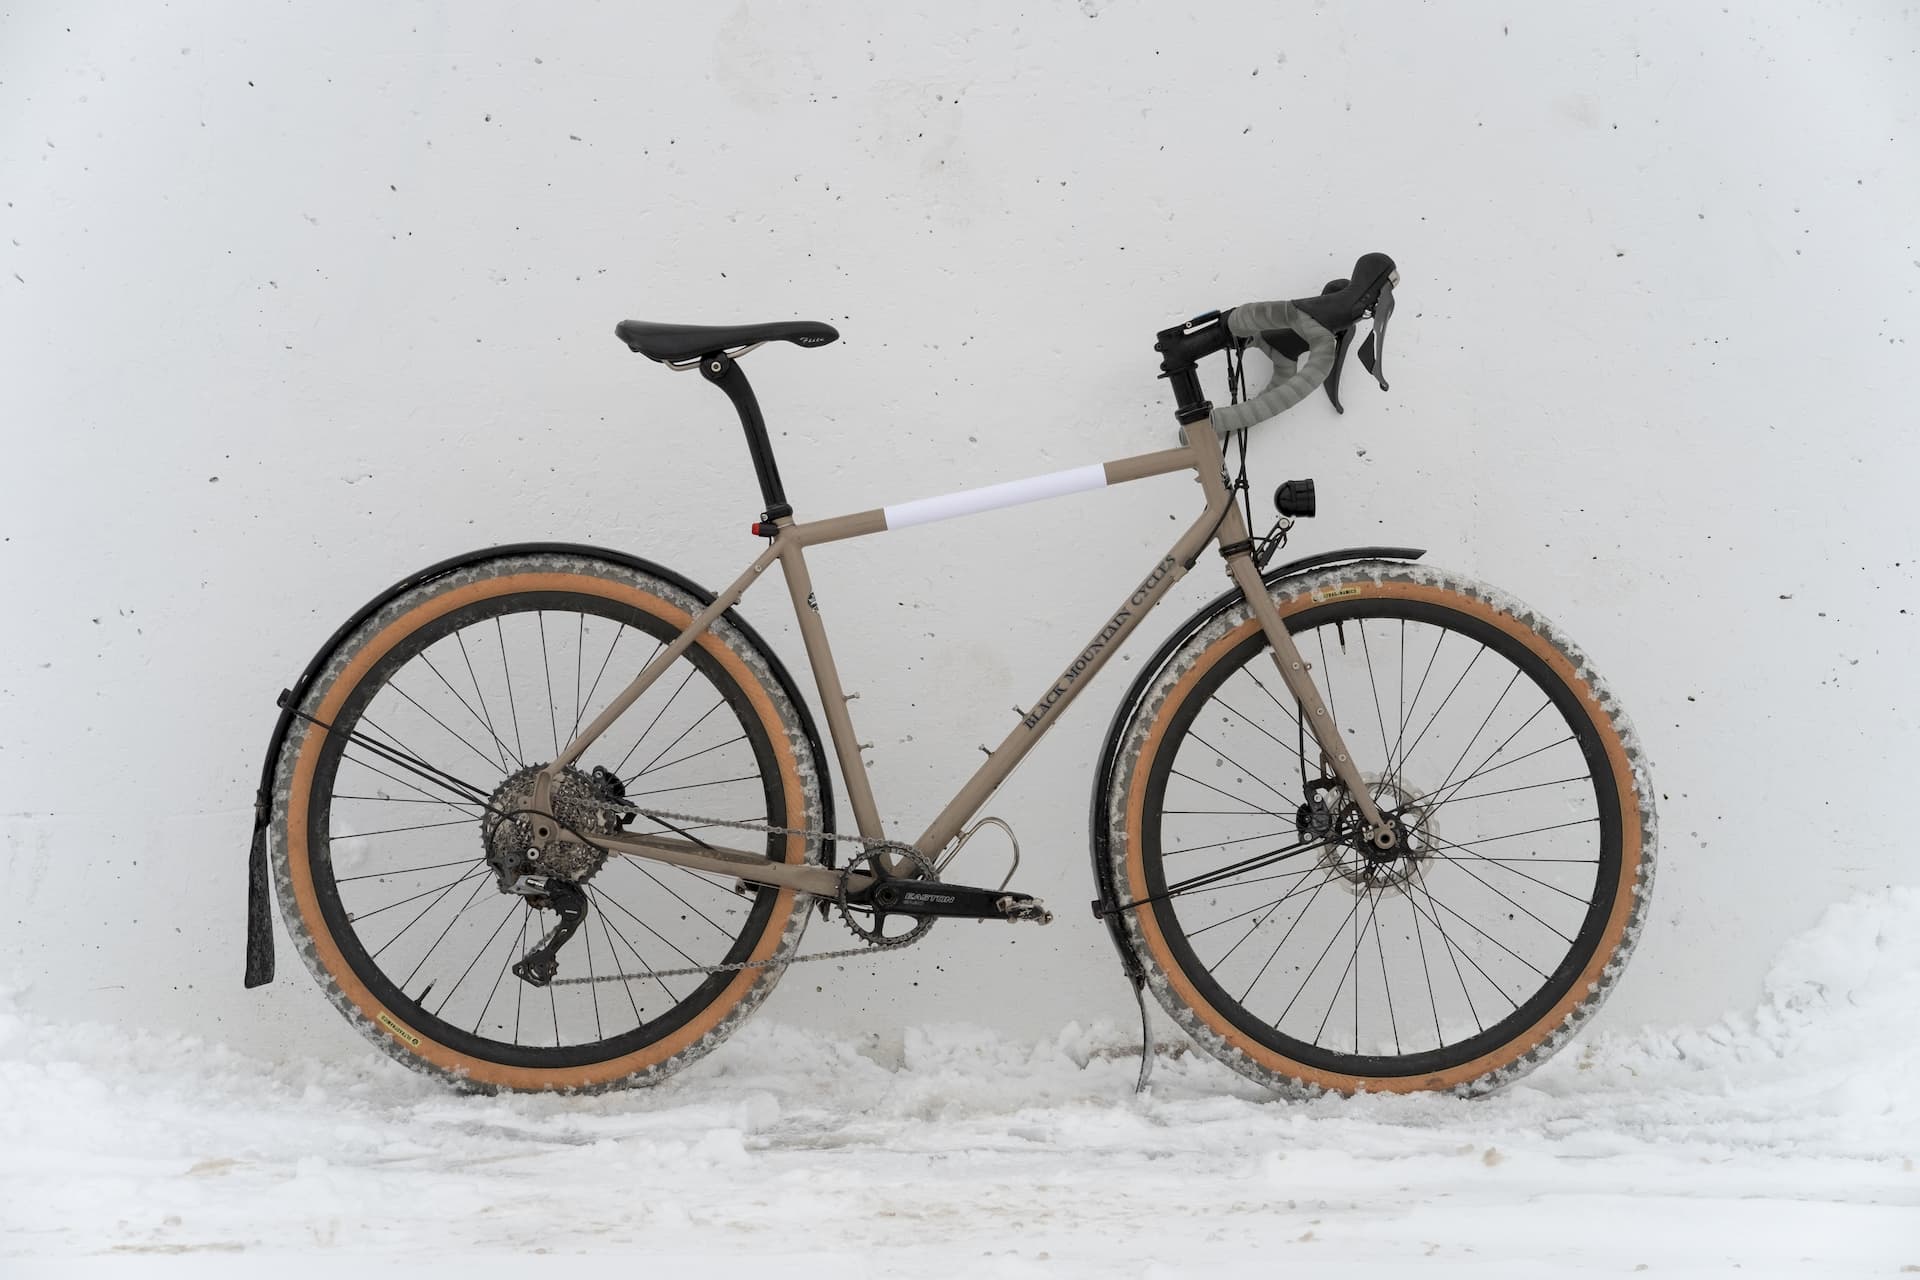
Perfect!
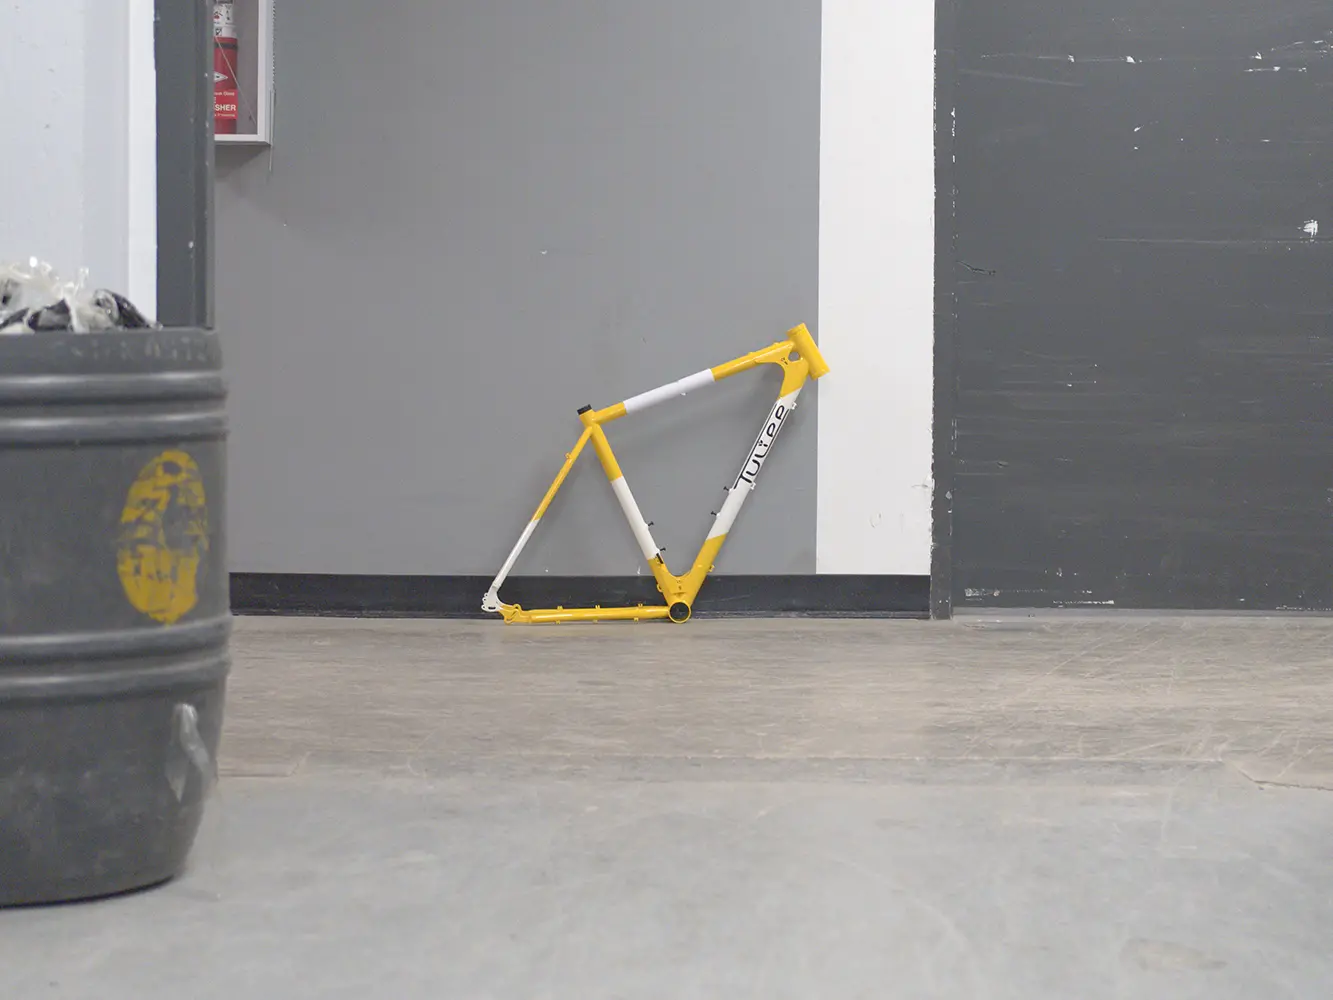
Common mistakes to avoid:
(correct) centered / perpendicular
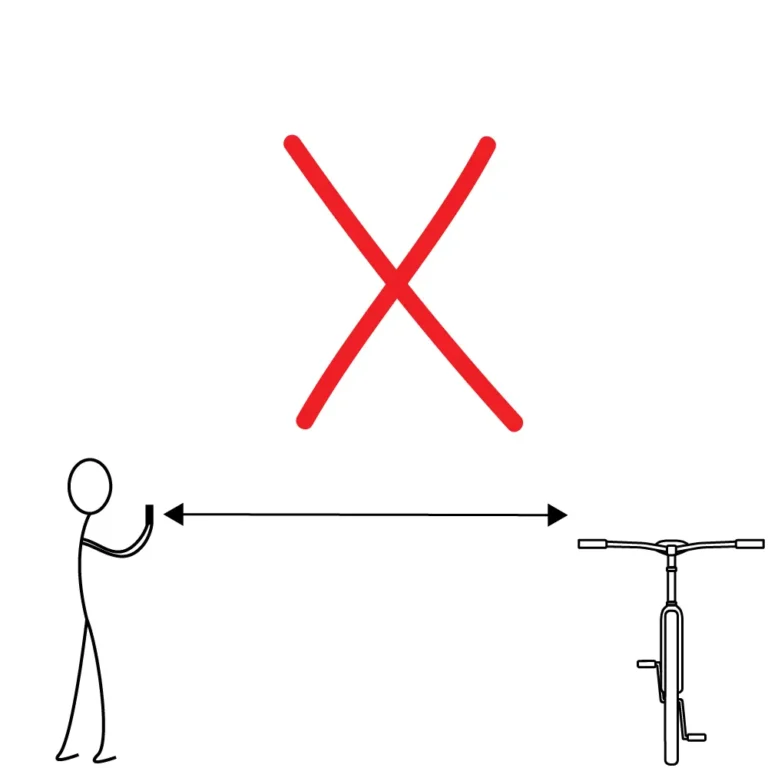
(wrong) shot at a slight angle
(correct) 25-30 feet away
(wrong) too close. 15' will work for phone camera but less accurate
(correct) level / centered
(wrong) too high
Image checklist:
If you’ve completed steps 1, 2, and 3 accurately, the following should apply:
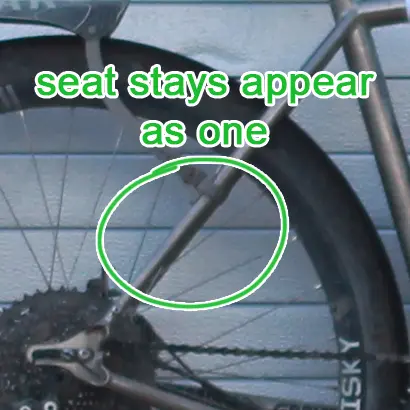
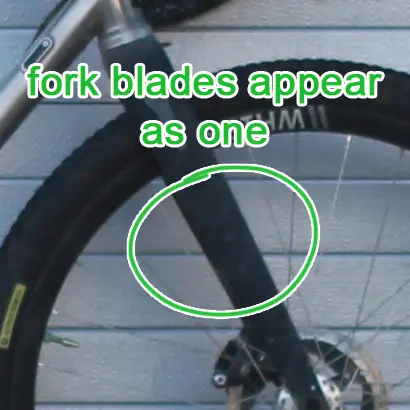
Rear chainstays, seatstays, and fork blades are either hidden or barely visible.
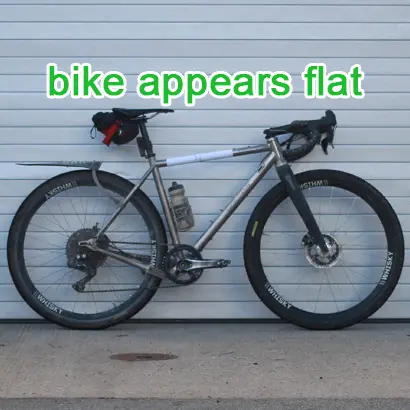
Bike looks flat
Crank arms are out of the way at 3 & 9 o'clock
Frame bolts are sticking out of the frame
Any relevant bottles & cages are installed
The photo is the highest quality and file-size available.
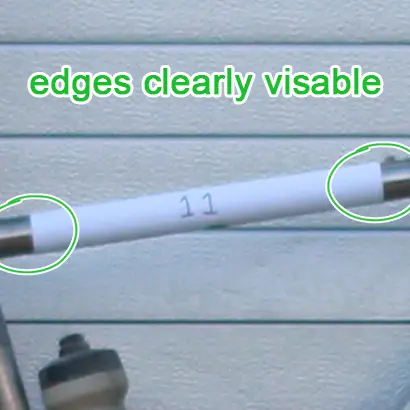
Scale reference edges are clearly visible
Photo is taken in landscape
Examples:
Nice job!
Email highest resolution image to [email protected]in landscape orientation with your name, order number, and bike model and size
